

For two years my left knee would ache about fifteen minutes into any walk, and the stairs at my house might as well have been a mountain. My daughter told me about knee compression sleeves. I bought the first one I saw, it slid down within an hour and did nothing at all. Then I bought a second one that was far too tight and left a red ring around my leg by suppertime. I almost gave up on the idea entirely, and I am glad I did not, because the Modvel two pack finally ended all of that.
The truth is, there is no single best knee sleeve for everyone. A sleeve that is perfect for an athlete in their twenties can be useless for my knees. The reason most people end up disappointed, and I say this with warmth because I did exactly the same thing, is that they pick one without taking a few quick measurements and without thinking about what the sleeve will actually do all day. This guide walks you through each step, in plain language, so you can buy the right thing the first time and get back to moving around your own home comfortably.
Start with the sleeve that fits like it was made for your leg
After trying several, I settled on a two pack of sleeves that finally stayed put and supported my knee through a full day of chores, walks, and stairs. You can check today's price on Amazon and see whether the sizing guide matches what you measure with a tape.
Amazon Check Today's Price on Amazon →Step 1: Measure your leg a few inches above the kneecap
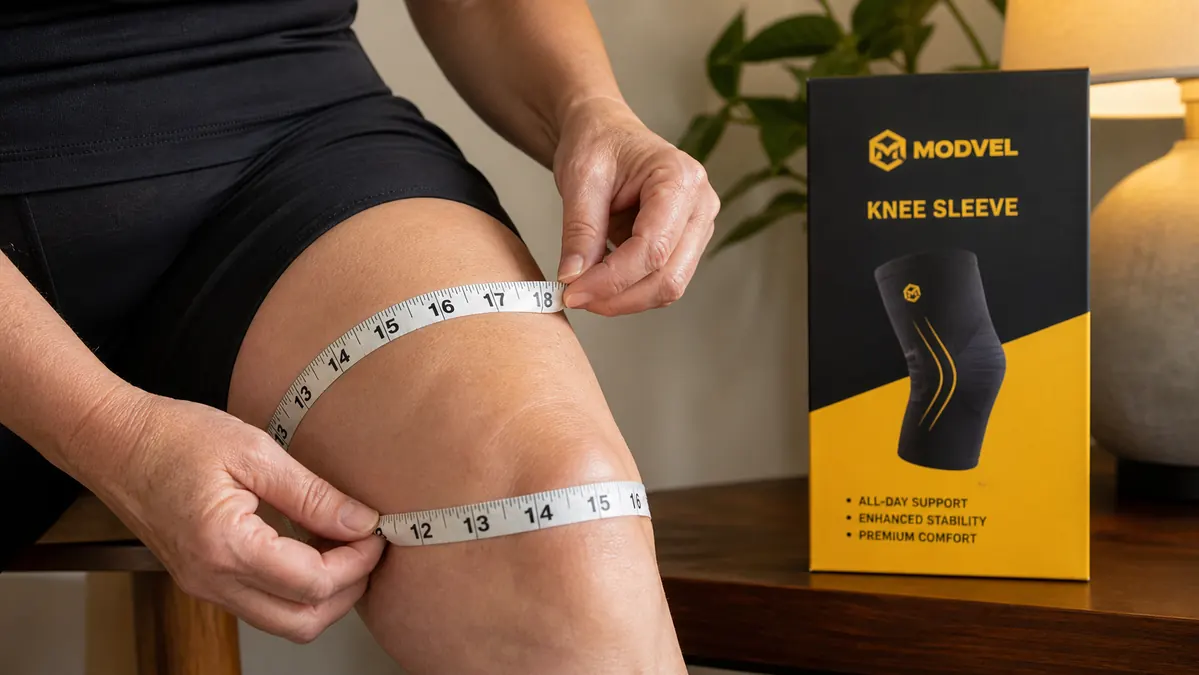
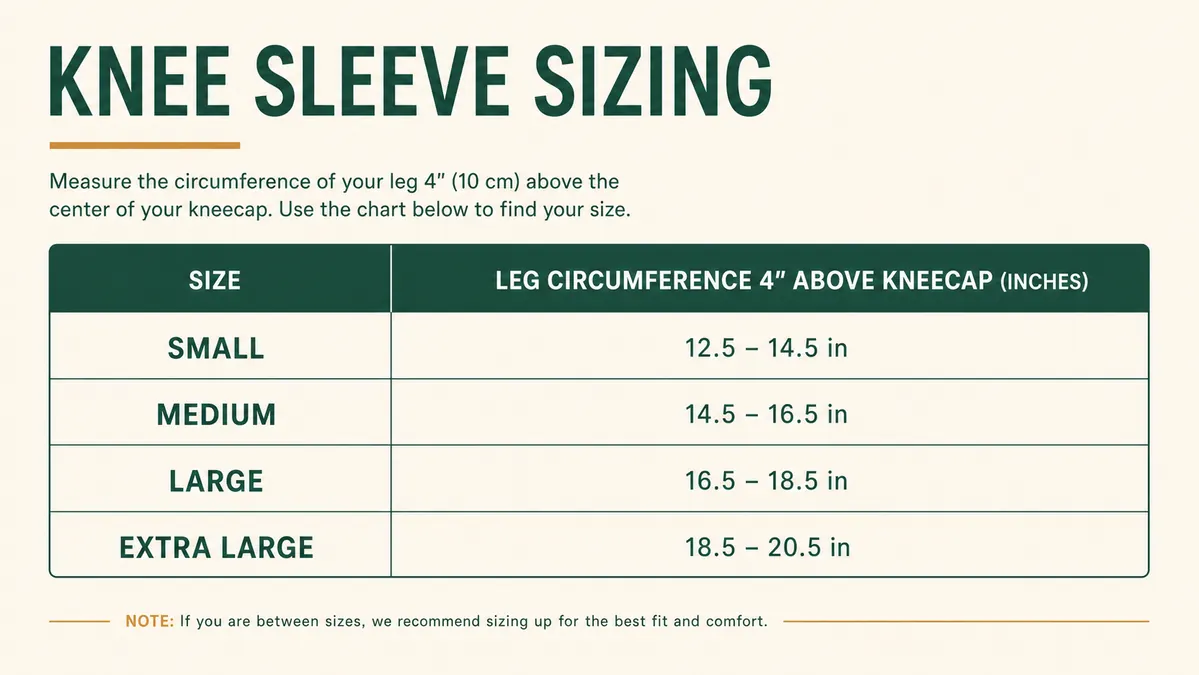
This is the step almost everyone skips, and it is the one that causes the most problems. Grab a soft cloth measuring tape, the kind a seamstress uses, and sit in a chair with your knee bent at about a 90 degree angle. Wrap the tape around your upper leg about four inches above the top of your kneecap. Write that number down. Then do the same right around the thickest part of the kneecap itself. Most good sizing charts go by the upper leg measurement, but having both helps you spot a leg that tapers a lot toward the knee.
Now here is the part I wish someone had told me at the start. Measure both legs, because they are rarely the same size. My left thigh is about half an inch bigger than my right, and if I had ordered my size from one leg only, the sleeve for the other would have been loose. If you fall near the edge of a size range, size up rather than down. A slightly roomier sleeve can be swapped for a lighter fit, but one that is too tight will pinch behind the knee and slide up anyway.
Do the measuring while you are sitting, not standing. Standing pulls the skin and muscle tight and gives you a bigger number, which leads to sleeves that are too large. I measured standing the first time, ordered a size too big, and that is exactly how I ended up with the sleeve that spent the whole day bunched behind my knee. Ten quiet minutes with a tape measure saves you a return, another week of waiting, and a lot of frustration.
When the sleeve arrives, try it on before you cut off any tags, and move around a little. Sit, stand, walk to the kitchen and back. It should stay in place through all of that. If it feels loose on the very first wear, it will only get looser, so do not talk yourself into keeping it. Trust the tape measure you started with, because that number does not lie even when the package looks appealing.
Step 2: Choose the compression level for what you actually need
Compression sleeves are not all the same firmness, and firmness is what does the real work. A light sleeve is mostly just a layer of fabric that offers a little warmth and a feeling of being supported. It helps a mildly stiff knee through an ordinary day. Firm compression, the kind that uses a snug knit or reinforced side panels, hugs the joint more and gives noticeable support when your knee feels wobbly or you are about to tackle stairs.
For most of us who are not athletes, firm is usually the better choice. What you are looking for is a steady, even squeeze around the whole knee, not a tight band at the top or bottom. When you put it on, it should feel supportive but not painful. You should be able to slip two fingers flat between the fabric and your calf. If you cannot get two fingers in there, it is too tight, no matter how snug it looks in the mirror.
I made my best decision when I chose the Modvel sleeve with a snug, firm knit that gave real support. The difference was night and day compared to the flimsy first one. If your knee just gets stiff in the evening and you want something light to wear around the house, go light. If you want help getting up from low chairs or steadying yourself going down stairs, firm compression is the one that will actually make you feel planted.
Step 3: Look at the fabric and how it breathes
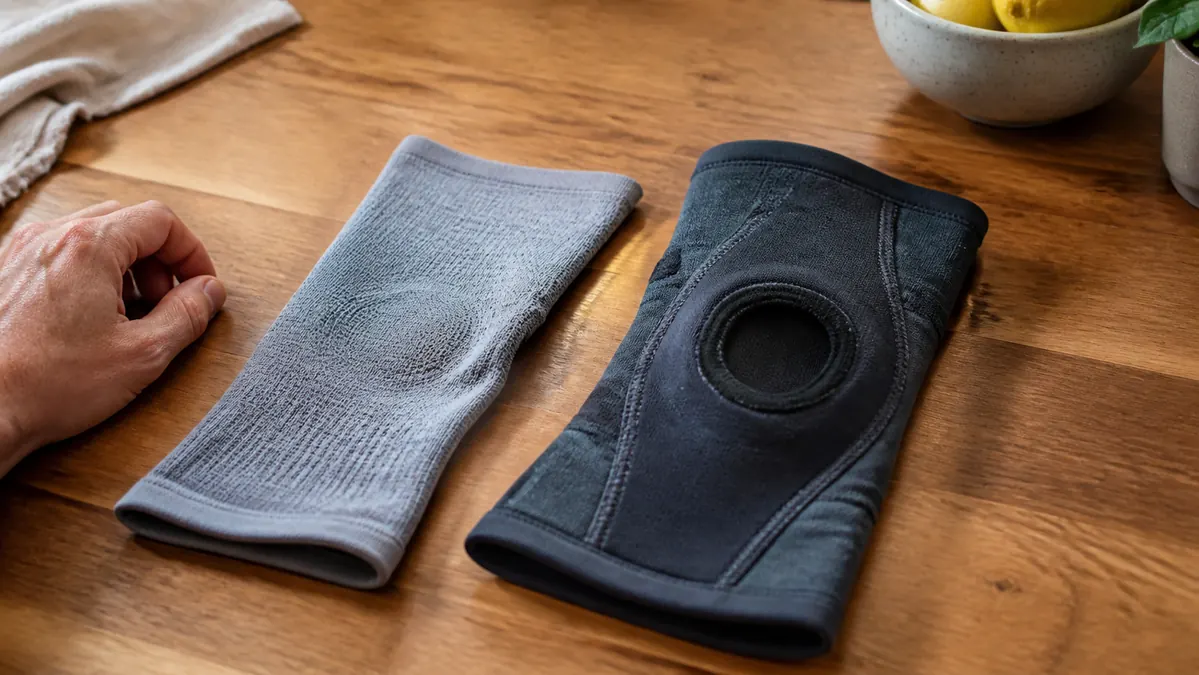
Fabric decides comfort more than any single thing, because you will be wearing this against your skin for hours at a stretch. You want a blend that stretches and springs back, usually nylon or polyester mixed with a little spandex. Wool and cotton can feel soft at first, but they stretch out of shape fast and hold sweat against the skin. A good knit breathes, so air can move and your skin does not sit in damp fabric all afternoon in warm weather.
Look closely at the seams, and I mean really closely. The cheapest sleeves have thick raised seams that rub against the back of the knee, and that gets miserable by hour two of a long day. Check the reviews specifically for the words rolling down or bunching. Those two complaints, more than any others, tell you a sleeve has a fit problem that no amount of fabric quality can fix.
A sleeve with a silicone band or a textured gripper at the top edge will stay put much better than one that relies on stretch alone. That little gripper was the difference between my first sleeve sliding down by lunch and the Modvel one I now wear from breakfast through dinner. If you have sensitive skin, look for one described as soft and breathable, and wash it inside out on a gentle cycle so the gripper keeps its grip for a long time.
Step 4: Know the difference between a sleeve and a brace
People use the words sleeve and brace as if they were the same thing, and they are not. A compression sleeve is a stretchy tube of fabric that wraps the knee in gentle support and warmth. It helps with stiffness, achy joints, and everyday soreness. A brace has rigid stays, hinges, or straps, and it is for the person who needs real structural support because a knee gives way or was injured. A brace is a bigger commitment, heavier, and harder to wear all day long.
If you have arthritis or everyday stiffness, a sleeve is usually the right, lighter choice. If your knee has ever buckled under you, or you are recovering from a real injury and your doctor recommends support, a structured brace may suit you better. This is the question I wish I had asked myself before my very first purchase, because I needed a sleeve and the difference between the two is exactly where so many people get lost.
I go into the full comparison in my separate piece on sleeves versus braces, and it lays out the honest tradeoffs for each. The short version is this: for daily comfort and support of stiff knees, a sleeve is almost always the gentler and more practical pick. Keep the brace for the times you truly need the extra structure, and let the severity of your own knee decide which one belongs in your drawer.
Step 5: Think about how you will wear it all day long
Before you order, picture the actual day you will spend in this sleeve. Are you going to wear it for a two mile walk, for a long sit at the kitchen table doing bills, or through a full day of puttering around the house and garden? That changes what you need. A sleeve for light daily use should be comfortable enough to forget you are wearing it. One for walks should have a gripper so it does not slide down on the trail when you get warm.
Take a look at how many sleeves come in the package. A two pack is genuinely useful even if you think you only need one. You can wear one while the other is in the wash, and if one leg is a slightly different size you have a spare to compare against. That Modvel two pack idea is what finally got me out of the loaner and launder cycle I was stuck in with a single sleeve.
Read the reviews for people your age and your activity level, not the ones from runners. A review that says it supported someone through a 5k is interesting, but the review that says my grandmother wore this all day gardening is telling you what you actually need to know. Filter by those voices, measure your own leg, and the right choice becomes surprisingly obvious.
And give yourself a little grace on the first day. A new sleeve can feel strange for the first hour, like a new pair of shoes, so wear it for a short stretch before you decide. If it still pinches or rolls after that first proper day, it is not the sleeve for you, and that is fine. There are plenty of good options, and finding yours is a process of elimination, not a sign that your knees are hopeless.
What Else Helps
A good sleeve is support, not a cure, and a few small habits make it work far better. Warm up before you go out, even if it is just walking in place in the kitchen for two minutes. Gentle heat before activity and a few minutes of elevation after a long day both ease stiffness. And keep your leg moving, because a sleeve that lets you stay active is worth more than one you only pull on when pain already has you stopped.
I also learned to listen to my knee instead of pushing through. On days it is extra tired, I wear the sleeve a little longer and take the stairs one at a time. On good days, I leave it off and let the joint breathe. The sleeve is a partner in your day, not a straitjacket. The more you treat the support as a tool rather than a crutch, the more it quietly does for you.
The sleeve that finally worked was the one I measured for, and I measured for it sitting down. Ten minutes with a cloth tape measure ended two years of aching walks and a drawer full of misfits.
Pick the sleeve that fits your own knee, not a guess
Take your two measurements with you and check the sizing chart on today's price page. A two pack of well-fitted sleeves means one is always clean and ready, and you can stop wrestling with sleeves that slide, bunch, or pinch before you ever leave the house.
Amazon Check Today's Price on Amazon →